
Playing with Photogrammetry 2
30 Jul 2014What we are dealing with
As discussed in the previous post, our first task is to figure out a way to find RAD targets on our images. Let’s have a look at these things then.
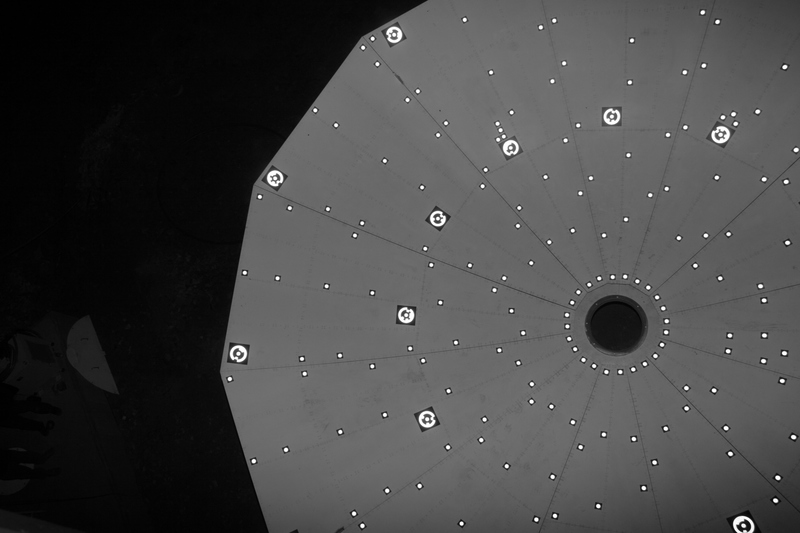
Here is a typical photo we will deal with.
And here is a closeup of one of the RAD targets:
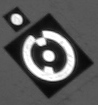
As you can see, there is an outer ring, with a single ‘notch’ and an inner circle. Between these there is another ring, with at least one segment filled in. These targets come in sets and the inner segments denote the encoding. There are 12 segments in the inner ring and 11 of them can be filled or blank. One is always filled and lines up with the notch in the outer ring. This is important, we’ll use this later.
You’ll also note that we don’t necessarily look at them perpendicularly so on an image they appear as rotated ellipses. So we need to figure out a way to distinguish the RAD target from the normal ones. You can see the uncoded target in the close-up image. This is just a circular target inside a black square.
The Tools
OK so we’re armed with a feeling of virtue and a sense of adventure, we are going to slay this beast. We need some help! As I mentioned in the first post, Python is by far my favourite programming language at the moment, but what else can we use to ease our task? I’ve decided on the following, for the time being:
- opencv: The computer vision libraries, provides a lot of very useful tools that will save a lot of time.
- Matplotlib: Fantastic plotting library for python
- Numpy: Fast array and linear algebra library for python.
I’ll probably add to this list as time goes on but for the first part of the problem, these will suffice.
Finding targets
Our task is to find a certain bunch of ellipses on the image. How do we do that? We can clearly see the targets in the image, but the problem really is to translate “ooh there’s a target and there’s a target and THERE’S a target…” into some language the computer can understand.
Any ideas?
What makes those targets special? The designers of the targets cleverly put
the reflective material onto a black background so that the edges are
clearly visible. So that brings us the answer too. We need to find the edges
of the ellipses. Edge-finding algorithms are well known and a lot of them work
more or less like the Discrete La Place
Operator
When you convolve an image with such an operator, the result contains information
of where the gradient changes the fastest i.e. edges. All well-known image
manipulation (Photoshop, GIMP etc.) have this edge-operator available to them.
An evolution of this, for purposes like ours, is the
Canny Edge Detector, and we
will use the implementation provided in opencv for that, here’s the code I
used for this particular image.
def find_edges(img):
    ''' Find edges in the given image
    '''
    edges = cv2.Canny(img, 100, 255, 31)

    return edges
Let’s look at what an image looks like if we detect the edges with Canny.
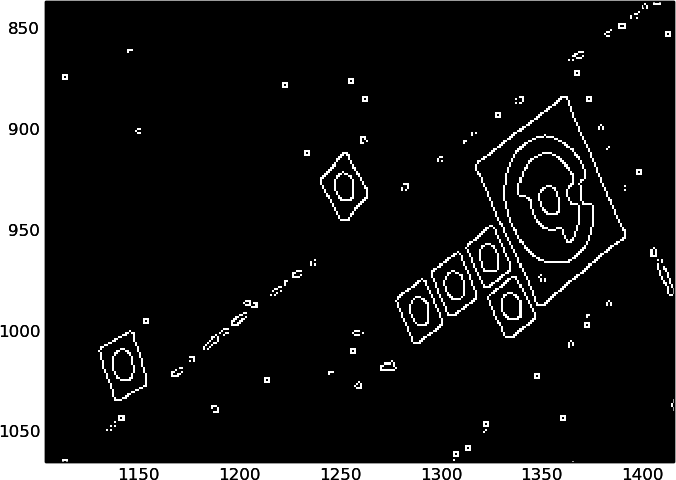
Pretty awesome. We can clearly see where the edges are and they match up with what we know the targets look like. Now, it may not always be as nice as this. An edge detector doesn’t guarantee that the edges will form closed loops, so it is possible that an edge can be just a straight line or an arc or a squiggly bit of pixels or whatever. Also remember from the other post, we need figure out which segments in the inner ring are colored in and which are not. The edge operator doesn’t allow us to figure this out, we could maybe figure it out from the original image by finding these edges and find the ones that are close to elliptical and then checking the image value along the perimeter of a smaller but concentric ellipse to see if it is above some value or below it.
This sounds fine but what if the image is well-illuminated on one half and badly on the other? Fortunately, someone else solved this problem before. We are going to use the method of adaptive thresholding. Thresholding, in short, means we make a new image where the new image value is, say, equal to 255 if the original image’s value was above the threshold, else we make it 0. It segments the image into regions that can be one value or the other. Adaptive thresholding is the same, except the threshold is calculated by looking at a smaller region around each pixel, giving you reasonable results if the illumination changes over the photo.
This was the code I used for the thresholding, I also used a blur filter to remove some noise from the image.
def get_threshold(img):
    blur = cv2.bilateralFilter(img, 5, 75, 75)
    thresh = cv2.adaptiveThreshold(blur, 255, cv2.ADAPTIVE_THRESH_GAUSSIAN_C,
                                   cv2.THRESH_BINARY, 21, 2)
    return thresh
This is what our image looks like when we have run an adaptive thresholding
algorithm on it, in this case one using a Gaussian weighted kernel.
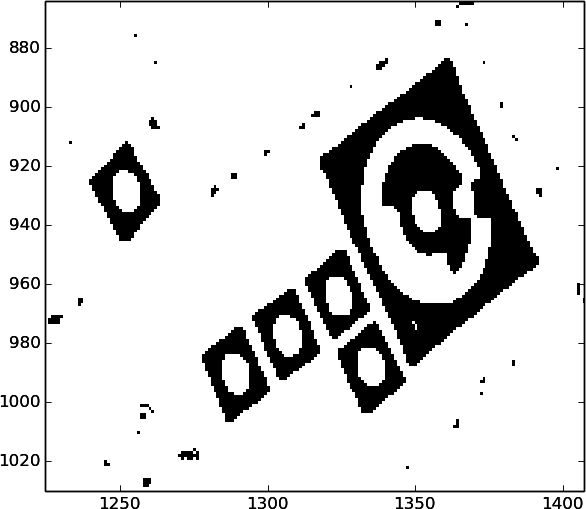
On this we can also clearly see the edges and we can see the high and low values of the inner ring on the targets. This was exactly what I was looking for! So all I need to do is find the outer edge again!
In the next post I’ll go through how I did that and how I then found and measured the value of those RAD targets.